 share on Buffer
In this tutorial we will make a presentation rendering with a complete environment.
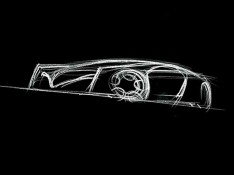
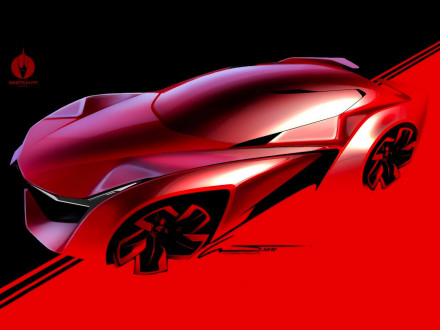
Let’start with a sketch: in this case I decided to draw a new GT for the Maserati brand. First, we have to choose the type of perspective, that will have a great influence on the final image composition. I used a wide framing to leave enough space for the environment in the backround in order to let the image breathe.
 |
 |
Import the sketch in Photoshop and try different canvas sizes with the crop tool until you achieve the desired image framing. I opted for a 16:9 format that adds dynamicity to the image.
On a new layer let’s draw the basic lines that define the enviroment. At this time we don’t have to worry too much about the result, since we will use this sketch as a reference and at the end it will be sent underneath all the other layers.
Create a new layer, set its blending mode to multiply and fill it with a medium tone color. Even if it is usually preferable to choose a saturated color, in this case I used a medium grey.
 |
 |
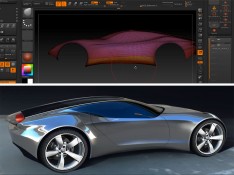
On a new layer let’s start defining the basic shapes and volumes of the car, using a hard tip brush with a low flow value (between about 10 and 30 depending on your sensibility) and using quick brushstrokes.
In order to give the image a more artistic look I switched to Corel Painter, but you can still use Photoshop if you have some natural and artistic brushes. Corel Painter can import PSD files without losing the layers information.
Now we enter the creative stage, and we can play around with brushes and color with no errors: time is the only limit.
 |
 |
The first thing to do is to define the main light source in order to obtain a coherent lighting and to apply colors correctly both to the car and the environment. In this case the light comes from the top right and goes to the bottom left.
In order to give more depth to specific zones, I used different color tones (warm and cool) and saturation values.
Let’s go back to Photoshop where we can smooth the brushstrokes and put the finishing touches to the quick sketch made in Painter.
 |
 |
On a new layer we can define the main details by using some hard brushes. It’s better not to exaggerate with details otherwise the final result will lose its freshness.
I then added the passerbys by quickly sketching each person on a new layer and applying a motion blur effect to them.
Now let’s add the lights, preferably using both warm and cool tones, in order to avoid a boring image.
 |
 |
Some effect lighting like LED or neon signs can be created on a new layer by selecting a hard tip brush, setting its mode to color dodge, and drawing the light contours and then adding the glowing effect with a big soft brush.

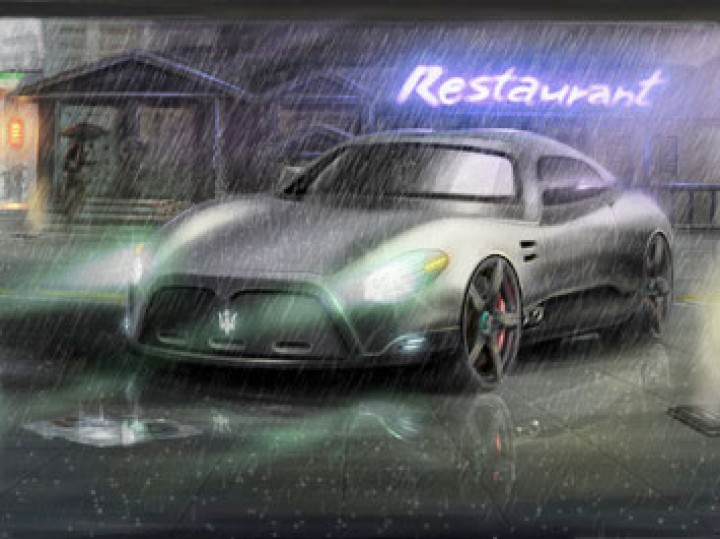
As a final touch I added the rain effect. you an create it very easily with a small rectangular brush by setting its spacing (Brushes > Brush Tip Shape > Spacing).
The we can add the final highlights and reflections using the dodge tool with hard brushes. Reflections are particularly important because they add realism and tridimensionality to the image.
I added the reflections on the hood, the puddle and the manhole cover, trying to reach a good compromise between time and quality.
As a footnote, when the filesize is growing too rapidly, we can merge some of the layers together with the merge layer option.
About the Author
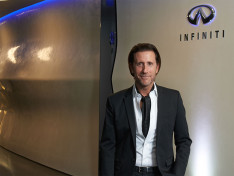
Giangiacomo Barbero received his Bachelor’s Degree in Transportation Design at the Istituto Europeo di Design of Turin in 2005.
In 2006 he had an Internship at the Idea Institute (Turin, Italy). He was finalist in the "Anfia stile italiano giovani 2006" design competition with the Lancia Delta concept and in the 2005
Canadian Autoshow "World Automotive Design Competition" with Alessi Bubble.
In 2005
his Ferrari Fiorano was one of the finalist projects in the "Ferrari – Concept of a Myth" Competition. In 2004 he has won BRABUS’ Wheels design contest.
His professional works include freelance wheels design for various companies,
official package versions design for Alfa Romeo, Suzuki, Toyota and Fiat.
For Car Body Design Giangiacomo Barbero has also written the tutorial "Quick sketch in Photoshop".
Contacts:
- email: giangi.barbero@tin.it
- Mobile phone: +39 333 4015842


Comments